
The age of the professional studio has come to an end - or at the very least, radically changed from its peak role in the 80s.
It’s possible (and sometimes even easier) to get great guitar recordings on your own with home studio equipment, provided you know what you’re doing.
I’m going to give you a rundown on all the gear you’ll need, the processes involved and the best places to start if you want to record your guitar playing at home (or really any other instrument for that matter).
What Gear Do You Need?
The key to understanding recording guitar is to think about signal flow.
Let’s start with an acoustic guitar.
The sound comes from the guitar, in the form of soundwaves.
We need to capture those soundwaves, so we would need either a microphone (or a pickup).
This microphone converts the soundwave to an electrical current and runs that along a mic lead.
This then plugs into a microphone preamp, which raises the ‘volume’ of the microphone signal. These preamps can also colour the tone of the signal, though don’t worry too much about this for now.
The preamp then sends its signal into the audio interface, which is a device which converts the analogue, electrical signal to a digital signal that a computer can work with. It’s basically the computer’s interpreter. Most audio interfaces have a microphone preamp built in, so you will likely have one device that does both jobs.
The audio interface connects to your computer, but remember that when we say computer, we are including tablets and phones. This is usually a USB connection, but higher-end interfaces may connect by Thunderbolt, PCIe or (for older interfaces) Firewire.
Inside the computer, we need software that can capture this digital signal, which we call a Digital Audio Workstation (DAW). There are many types of DAWs with different strengths and weaknesses.
Finally, we need to send the signal back out from the DAW, which we can do via headphones, speaker monitors (via the computer or via the audio interface, depending on your setup) and of course by exporting an audio file which we can press to CD (for old people) or upload.
To summarise this into real-world items, you’ll need:
An acoustic guitar
A microphone
1x microphone lead (also known as an XLR cable)
an audio interface
a computer
DAW software
headphones or speakers (and any cables required for the speakers)
Now, if you want to record with an electric guitar, you COULD still use a microphone, and instead of pointing it at the guitar, you just point it at your amp. This is great if you love the sound of your amp as is and don’t want to do any tinkering with the sound, but does limit you later on down the track as you are stuck with that particular sound. If you only have one amp, it can also be a problem if you want a variety of different guitar tones.
The alternative is to send your guitar into the audio interface directly, which will give you a clean guitar signal. From there, you can get plugins on your computer’s DAW software to simulate lots of different amps. The best part about it is that you don’t need to record multiple times to hear the different amps, you just send that one clean sound into as many digital amps as you want.
If you are going to go this route, best practice is to replace the microphone with a DI box. The DI (direct input) box just bumps up the ‘volume’ of the guitar signal a bit, which will make it sound a bit better for recording. Many modern audio interfaces may not need the DI box, and instead allow you to just plug your guitar lead directly into the interface itself. If in doubt, try it going direct in first and see how it sounds - if it’s a bit weak sounding, too quiet or too hiss-y/noisy, get a good passive DI box.
So What Gear is Best?
This is where things get a bit tricky, depending on what you’re after.
Firstly, I am not going to link to any particular products with affiliate links or any of that garbage because:
a) this is meant to give you knowledge, not sell you products
b) most local music shops will bundle gear together when you’re starting out and will be able to give you extra tips, so it’s worth going to them directly (makes troubleshooting and warranties much easier too, as I’ve found online music retailers rarely follow the law and honour warranties)
c) everyone has different budgets and requirements, and if you take the time to understand the differences between the products, you’ll learn a lot more.
Also note that music equipment that’s good for live use is not necessarily great for the studio.
There are three main factors to consider when purchasing recording audio equipment:
How reliable is it? (i.e. will the gear break?)
How good does it sound?
How future-proof is it? (i.e. will it receive software updates in future, will it become obsolete etc.
I’ll give you a rundown on each piece of equipment and give you my recommendations on what to look for, as it’s hard to know what matters and what doesn’t.
The Guitar
If you’re playing on an electric guitar, having good pickups and good guitar leads will make your life so much easier. No need to go crazy, but old ratty cables will likely crackle and pop, and very cheap, stock pickups in a guitar will likely sound thin.
If you’re on an acoustic guitar, fresh strings will always sound brighter and clearer, and the nicer the soundboard (the piece of wood on the face of the guitar) generally the better the sound you’ll get out of it. Note that the pickup rarely matters in an acoustic guitar for recording purposes, as the sound from microphones is normally much better (pickups are better for live, though feel free to try them out in the studio if you want to experiment).
Remember this mantra: garbage in equals garbage out. Make sure you have a decent guitar, as after all, if you’re reading this, you’re most likely a guitarist!
Reliability: If you have a guitar that sometimes cuts out or hums, get it serviced by a professional or give your guitar a setup on your own. You’ll waste way too many hours of recording time trying to overcome those sort of headaches. Likewise, make sure the guitar stays in tune.
Sound quality: New strings, good intonation and decent pickups (for electrics) are the key. Remember that it all depends on the sound you want, so don’t think in terms of “good vs. bad”, think in terms of “suits the sound I want or doesn’t”.
Future-proof: Guitars don’t need replacing, just some love. Always a good place to invest your equipment budget as a good guitar can last a lifetime.
Most studios will have a bunch of guitars for different purposes, which is far, far more effective approach than trying to get one amazing jack-of-all-trades, but so long as you have one decent guitar to get started you can always get more if and when you need to later on down the track.
The Microphone

There are two main types of microphones used in the studio: dynamic microphones and condenser microphones.
I won’t go into the technical differences for now (super interesting if you’re into that side of things, but save that for another day), but basically a condenser mic gives a much wider frequency response (in other words, catches more sound) than a dynamic microphone.
So I should just go for a condenser mic then, right? Unfortunately, the tech in a condenser microphone is a lot more fragile and a lot more expensive, so it’s not so clear cut.
In general yes, condenser is better for recording and dynamic is better for live (for guitar, anyway), but a cheap condenser microphone is just not worth it for guitar. I would say if you have a budget of less than $200 for your microphone, go for a good dynamic microphone like a Shure SM57 (the most widely used guitar mic ever, which is also used for lots of other purposes). If it’s $400+, go for one of the good condenser microphones (there are heaps to choose from and a quick Google search will show the industry standards with in-depth comparisons. Again, watch out for affiliate links in articles, as those articles are biased).
Reliability: A decent dynamic microphone is pretty much bulletproof. A good condenser mic is much more fragile, but if you treat it gently, you should have no problems. Again, beware cheap condensers!
Sound quality: Having a good mic will make a huge difference for your acoustic guitar or electric guitar amp recordings. Good condenser mics with a large diaphragm will be crystal clear, picking up the sound like you’re in the room. A good dynamic mic will miss out on some clarity but will still sound strong and can have a really professional sound. A good small diaphragm condenser mic will pick up amazing high end frequencies but will lack low end.
Future-proof: A top-tier condenser mic or dynamic mic will last you forever. Not so much a cheap or mid-range mic in its category, unless it has a really unique sound you love, as you’ll likely replace it when you need a clearer sound later on in your recording journey.
When I first started out in the recording space, I went for a bunch of Shure SM57s (dynamic microphones) for general use on drums and guitar amps and an AKG 414 (large diaphragm condenser mic, great for everything acoustic). Many other musicians I know have opted for cheaper condenser mics.
10 years later, I haven’t bought any new mics, because I haven’t needed to. Those guys who bought cheaper condensers? They are constantly upgrading their mics slightly, trying to get a little bit better sound with each purchase.
Work out your budget, look at the category of mic that fits your budget (dynamic or condenser) and get one of the best in its class. They all have slightly different sounds, so go with something versatile to begin with that people use for guitar.
Leads and Cables
This one’s easy. Get middle-of-the-road, standard cables and you’ll be fine. Leads make next to no difference to audio quality (unless they are broken or super, super cheap and nasty) so there’s no point going crazy here with gold-plated connections or ‘monster cable’ or anything like that. (I’ll try to do a blog post soon explaining the physics there for any doubters).
Just a couple of things to consider: type of cable and length.
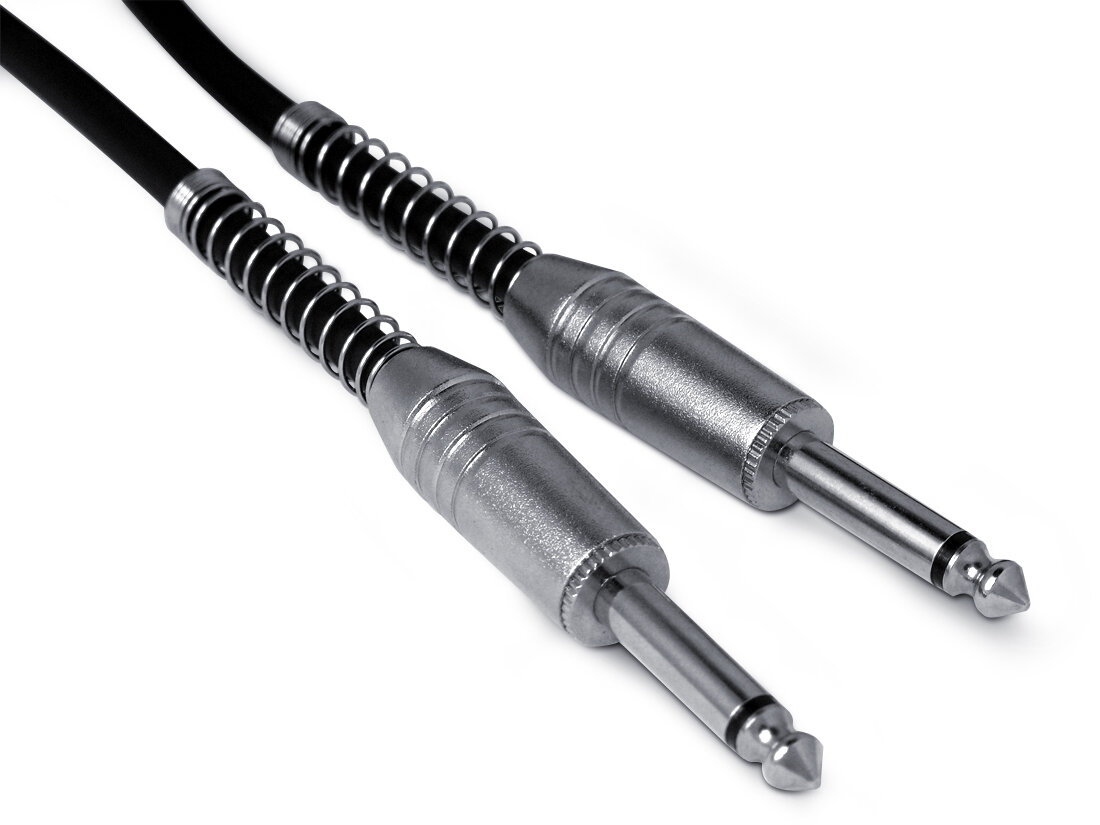
Guitar lead.
Guitar leads are used for plugging electric guitars or acoustic guitars with pickups into amps. For most audio interfaces, you can plug directly in from your guitar using a guitar lead. They are unbalanced (which practically means they are more susceptible to interference) so be sure to keep them away from power points, computers and appliances when recording.
It is possible to lose audio quality at longer lengths of guitar lead (2m+) so for recording purposes, go for standard lengths. Jimmy Hendrix supposedly used a long lead because he liked the effect it had on his tone (namely, reducing the high frequencies). That’s great for live if you want his tone, but we want to get as clear a signal into our digital gear as possible 99% of the time, so don’t copy him.

Mic (XLR) lead.
Mic leads (or XLR) are used for connecting microphones and other audio equipment like speakers, DI boxes and effects units together. They have a male and a female end (you can use your imagination to work out which is which and why) and are balanced, which means they are less likely to suffer from interference.
You can run mic leads a really long way without losing audio quality, but keep it practical. If you need a cable to connect your speakers to your audio interface, and they are right next to each other, don’t buy a 10m mic lead or you’ll have a messy recording environment.
The electronics in both types of cables are very simple, so in general you will pay extra for things like mute switches, lifetime warranties, fancier coiling and supposedly better components. Forget any extra bells and whistles, especially extra switches or add-ons, as these are the things that usually break!
Special call-out of a company I’ve had issues with - PlanetWaves offer lifetime warranties on their cables, but I and others have had lots of their cables break and mysteriously I nor anyone else I know have ever able to claim a replacement. I (and most of Hybrid Nightmares) use Swamp Industries or just go to local music shops and get their standard cables when we need more.
Reliability: Leads do break, but that’s usually because of abuse from use - things like running over a cable with your office chair one too many times. That being said, mic leads tend to be much hardier than guitar leads. If you take care of them they should last you many years.
Sound quality: So long as they work, next to no difference. Ignore the hype.
Future-proof: Guitar and mic leads are the same as they’ve always been. It’s analogue tech and it’s not looking like it’ll change anytime soon.
The Audio Interface

Focusrite Scarlett 2i2
Here’s where we get into tricky territory, as to many people the audio interface is a magic box that may well be sentient.
Audio interfaces have a number of key features, or roles:
ADC (Analogue to Digital Converter) - converts an electric cable from a mic or guitar lead into a digital signal.
DAC (Digital to Analogue Converter) - converts the digital signal from a computer to an analogue signal to play through headphones or speakers.
Inputs (usually with preamps) - how many ‘things’ you can plug in at once to record. This is usually in the form of XLR (microphone) inputs, but definitely read the specifications, as sometimes there will be something like 4 XLR inputs and 2 Instrument (guitar cable) inputs.
Outputs - how many speakers/headphones/monitors you can run out to at once. For most interfaces, we only need a stereo output (for two speakers) and a headphone output.
Phantom Power - required to power condenser microphones. This is run along the mic lead, and SHOULD be standard on all interfaces, but some cheap ones don’t include it. It’ll usually say 48V or something similar to indicate this function.
On top of that, many audio interfaces will have things like:
MIDI inputs - allows you to plug in MIDI gear like a digital piano or an old drum machine. In general, not that useful as most modern MIDI gear works via USB as well, so you can just plug it directly into your computer.
Onboard Effects - allows you to change the sound of the signal as you record it. For your first setup, these are a little bit redundant in my opinion, as we usually want to add effects after recording using our computer plugins.
There are so many different types of audio interfaces out there, but in general, the main differences between them all are:
Number of Inputs and Outputs (I/O)
Audio and build quality
Software/Hardware compatibility
In short, you pay more for more inputs or outputs and better audio and build quality. If you go with an unknown brand, you may run into software and hardware compatibility options, but this can be a problem with the big guys too, so you’ll just have to make sure it works on your operating system and your chosen DAW.
So what’s the best option for guitar recording? It’s actually pretty simple - if you only need to record one guitar at a time (which is by far the most common way to track guitar at home), you only need one input. If you want to record a full drumkit, you’re going to need 8-16 inputs. Just get one that meets your required number of inputs and is compatible with your computer and DAW.
It’s always a trade off between price, audio quality and number of inputs, so if you don’t need the extra inputs, put that money into a better quality interface (or a better mic).
Reliability: Audio interfaces have digital components and are quite complex compared to our other gear. They can be a bit temperamental, so my advice is to go by user reviews. If there is a large base of users on the product forums and only minimal complaints of faulty interfaces, you’re likely onto a winner.
Sound quality: Dirt-cheap interfaces (<$100) generally do worsen your sound quality, but after that we’re talking differences that many people can’t even hear. A $1000 interface may sound 1% better than a $200 interface, for example. Don’t worry too much about the sound quality, unless you see a lot of reviews saying “this interface sounds like garbage” or the brand is totally unknown with few reviews.
Future-proof: Unfortunately, it’s a real shot-in-the-dark sometimes when you’re trying to work out how long your audio interface will last. Whilst the basic functionality hasn’t changed too much recently, every company I’ve come across inevitably stops releasing firmware updates for their older models, which means if you keep your computer up-to-date, you may eventually find your interface is no longer going to work (even though it may technically still be fine). This is compounded by the changing connection standards, like the move to USB-C and Thunderbolt.
The Computer and DAW
This one is almost always going to be guided by what you already have, but the things we usually need for recording are:
Decent CPU
RAM
And that’s about it. More powerful computers generally mean more instruments running at once, more effects processed and reduced latency (lag between when you play and when you hear a sound) but really, when you’re starting out it shouldn’t be a problem unless your computer is so old or under-powered that it can’t run the latest operating systems.
Speaking of operating systems, you do have to be careful here, as whilst both Windows and Mac are used by recording engineers, most recording computers are running older versions for compatibility reasons.
For example, ProTools, one of the most used DAWs, doesn’t run on Mac OSX Catalina today, in August 2020, even though Catalina came out 10 months ago. DAWs are always behind the times, and it’s the same thing for drivers for audio interfaces too. You never really know when (or sometimes, if) an update will come out.
For that reason, ideally you’d have one recording computer that is basically isolated, running a stable OS, and you just never update it. I know for many people that’s not practical (and sometimes not safe, as many OS updates include security updates) but the alternative is to be very, very careful with updates. Backup everything before you update your computer, or software, and be ready to roll it back if you run into problems like “my audio interface no longer works” or “Cubase keeps crashing”.
Just to be super clear, even if my DAW asks you to update for a bug fix or a new feature, I would ONLY do it if I had everything backed up and was prepared to waste a day troubleshooting any potential problems. That’s time that could be spent recording, so DO NOT just update your DAW like you would other software!
With that out of the way, for DAWs, the most popular are:
ProTools
Logic (for Mac)
Garageband (for Mac)
Cubase
Reaper
Ableton
…the list goes on! I would go with whichever one you can get your hands on as a demo, do some tutorials and see if it clicks with you.
I studied and know ProTools the best, but they have moved to a subscription model so I typically use Reaper now…but it is challenging to jump between different systems, so do some experimenting and then try to settle in for a while.
Reliability: You know what computers are like. They are as reliable as they can be, but they’re complex and you’re probably not just using them for recording, so it really depends.
Sound quality: No difference. Although, if you have a particularly buggy computer, you may have issues playing and recording at times, which would affect your recording quality.
Future-proof: Computers are constantly being updated and superseded by new models. What’s more, repairs are sometimes impossible. Don’t assume your computer will be with you for a long time.
Speakers, Headphones and Monitors

To be able to hear your music and mix it well, you need to get an accurate representation of what it sounds like.
The best way to mix is with good studio monitors in a treated room (i.e. a room with lots of sound absorption and deflection to make a balanced listening environment). Making a room appropriate for this can be extremely expensive, so many new engineers opt for headphones instead.
No need to get gaming headphones with spatial surround or anything crazy, as for music we still just use stereo (left and right). If you wanted to do 5.1 or 7.1 surround sound mixing for film, you’d do that with speakers, not headphones anyway.
If this is your first setup and your budget is small, get some great closed cans (headphones). Not bluetooth, not noise-cancelling, nothing by Dr. Dre - just good solid, balanced cans. My Beyerdynamic DT 770 Pros have lasted me 10 years and whilst I prefer to mix with the studio monitors, they are still great for general use.
Look for the Pro-Audio or “audiophile” headphone brands, not the consumer ones, as the first category are designed to give an accurate representation of the sound, whilst consumer ones are designed to sound “good”. The best ones are the ones that go over your ears (not sitting on your ears) as you’ll then get the sound coming through your cochlear and your entire ear in a more natural fashion. You’ll usually be able to tell which ones are pro-audio by the fact that they have a 1/4” connector instead of the 1/8” connector (though it may have both).
If you do want to go the speaker route, look for a set of “studio monitors”. There are heaps of standards to choose from and they all do the job, just remember they can only sound as good as the room they’re placed in. Follow the instructions on where to place and point them.
Reliability: If you get a good brand and treat them well, they’ll last. Be careful with cables for headphones though - it may be worth getting a set that has a detachable headphone cable so you can replace it if necessary.
Sound quality: Massive difference, but indirectly - if you can hear things better, you can work with them better, so you’ll get a better idea of what to work on in your playing and recordings.
Future-proof: Again, if you get good analogue headphones or monitors, they will last a very long time. That’s part of the reason why I would recommend avoiding wireless headphones or anything that requires software to operate - no Bose or Sonos stuff!
Budgeting and Setup
If I had $1000 to setup a recording rig for guitar at home from scratch (assuming I already have a computer and a guitar), I would go with:
Shure SM57 ($200)
BeyderDynamic DT 770 Headphones ($300)
Focusrite Scarlett 2i2 Audio Interface ($350)
Mic lead, guitar lead and a mic stand ($90)
Reaper (for PC, $60) or Garageband (for Mac, free)
You can swap out the gear easily for another one you like the look of, but that split of budget makes the most sense to me - we’re not blowing heaps of money on software that may be obsolete in a year, but our interface, mic and headphones should last us a really long time, no matter what gear we get later.
If I had an extra $1000, I’d add an AKG 414 to that list for recording acoustic guitars, vocals…or anything really.
Once you have all the gear, it’s super easy to setup the hardware side if you follow the instructions.
The first big challenge is installing your DAW software and actually recording some guitars!
To begin, I would recommend:
Download the DAW software
Downloading the drivers for your audio interface
Watching a tutorial on how to record guitar on your chosen DAW
Get a guitar signal into the computer
Export that guitar signal as a .wav file or an .mp3
If you can do that, you’re ready to push yourself by finding:
Guitar amp plugins and effects plugins (you can find heaps of free ones online, or you can buy them)
Beats, loops and MIDI editing to make your own backing tracks
Editing and modifying your guitar tracks - for example, cutting out a note or modifying the speed of your playing with software.
All of these extra tasks are part of the journey, so set yourself some little goals and achieve them. Don’t say “let’s record a full orchestra album” from the get go - I’m talking about “let’s get the guitar louder” or “let’s try recording a chord part and a lead part over the top”.
Where to get recording equipment
If possible, your local music store. Yes, you can buy online, but there’s a few reasons why I wouldn’t do that, especially at the time and place of writing (Melbourne, Australia, during lockdown).
You’ll get extra advice for things you may have overlooked
You’ll make sure the gear all works together. If it doesn’t, you can…
Get warranty and repair service quickly and easily
Ensure you’ll actually receive your gear with the right power packs and cables. There are shortages of lots of audio equipment in Australia at the moment, so ordering from overseas is risky as you may be waiting a long time for your gear, and by that point, the gear may not be as valuable.
Once you have some experience, second-hand or online can be great too, especially for things like dynamic mics.
Do I still need an Audio Engineer or Producer?
To be clear, even though the equipment may have changed, the skills, science and art of the audio engineer (the one who records, mixes and produces music for a living) are still irreplaceable.
Think of it like the difference between a digital piano and a piano - yes, for many purposes the digital piano is just as good as a real piano, and has a lot more functionality.But you still need someone to actually play the thing. And those skills take study, practice and years to learn and master.
That being said, I’d argue it’s pretty difficult to be a successful musician today who only focuses on the playing aspect. You really need to have at least a fundamental grasp of things like recording, sound physics, electronics, equipment, songwriting and so on to connect the dots, so most musicians today understand at least the fundamentals of recording.
But don’t worry - you don’t need to be an expert to get started! Even though I’ve worked professionally as a live and recording engineer and have produced, tracked and mastered albums before, I am still not a master in this field.
What I do for Hybrid Nightmares’ releases is track the guitars as cleanly as possible, edit them, mix and produce the demo tracks, then send off all of these files to a dedicated audio engineer to mix. He’ll then send that to a dedicated mastering engineer (we’ll get to mastering in a later article, don’t worry) and then we’ll finally get the finished product back.
If I didn’t have these skills and recording equipment, we would be much more reliant on the engineer, which means:
Paying for studio/engineer time to record
More time constraints and reduced creative flexibility (if I want to record at 3am, I can do so on my own - but engineers don’t usually work 24/7 and need to be booked in advance)
Less creative control, as I can’t try things out and work at my own pace - I have to basically write /practice/record and that’s it.
So whether you want to become a professional recording engineer or just record your own stuff, remember - the level you take this to is completely up to you. If you do want to build your skills in this area, THE best way is practice. Offer to mix bands for free if you want some experience - yes, it’s bad to offer your services for free as a musician, but don’t think of it as work, think of it as practice, just like you practice your guitar.
It’s MUCH easier to practice with a variety of styles and artists if your end goal is to build your recording skillset, in the same way that playing other people’s songs on the guitar is a great way to build up a wide variety of skills as a player.
Hopefully this guide helps you guys get started on your journey, but remember, even though the basics are actually fairly simple (despite all of my waffling) it is hard and takes time to master the skills of the audio engineer. Use tutorials, make some recordings every week and you’ll start to get comfortable and familiar with your setup.
Once you’re at that comfortable level, you’ll find it easy to be creative and start recording - it just takes a bit of investment at the start to get going!