
We recently had our resident chord lord, Mitch Parker, take us through a bunch of tips and tricks for mastering chords on the guitar.
I won’t go into everything he covered in the masterclass as you’ll be reading all day, but I will share with you an approach for learning and understanding new chords shapes all over the guitar - not just for your rhythm guitar playing, but also for your lead arpeggios (I’m looking at you, shredders!).
Remember - you don’t have to master everything in this article at once. Focus on understanding one part really well, then progress. Guitar’s a marathon, not a sprint!
Step 1: Learn the Fretboard.
Ok, you’re probably sick of me saying this, but to really understand the neck and find all the chords, you just have to know the notes on the guitar.
If you need a shortcut, check out this guide to learning the guitar fretboard fast, but as a summary, I’d try it this way:
Learn all of the natural notes on ONE string at a time (probably the high or low E string as they’re the most useful). Don’t worry about sharps and flats for now, just play up and down through all the natural notes, saying the names as you go.
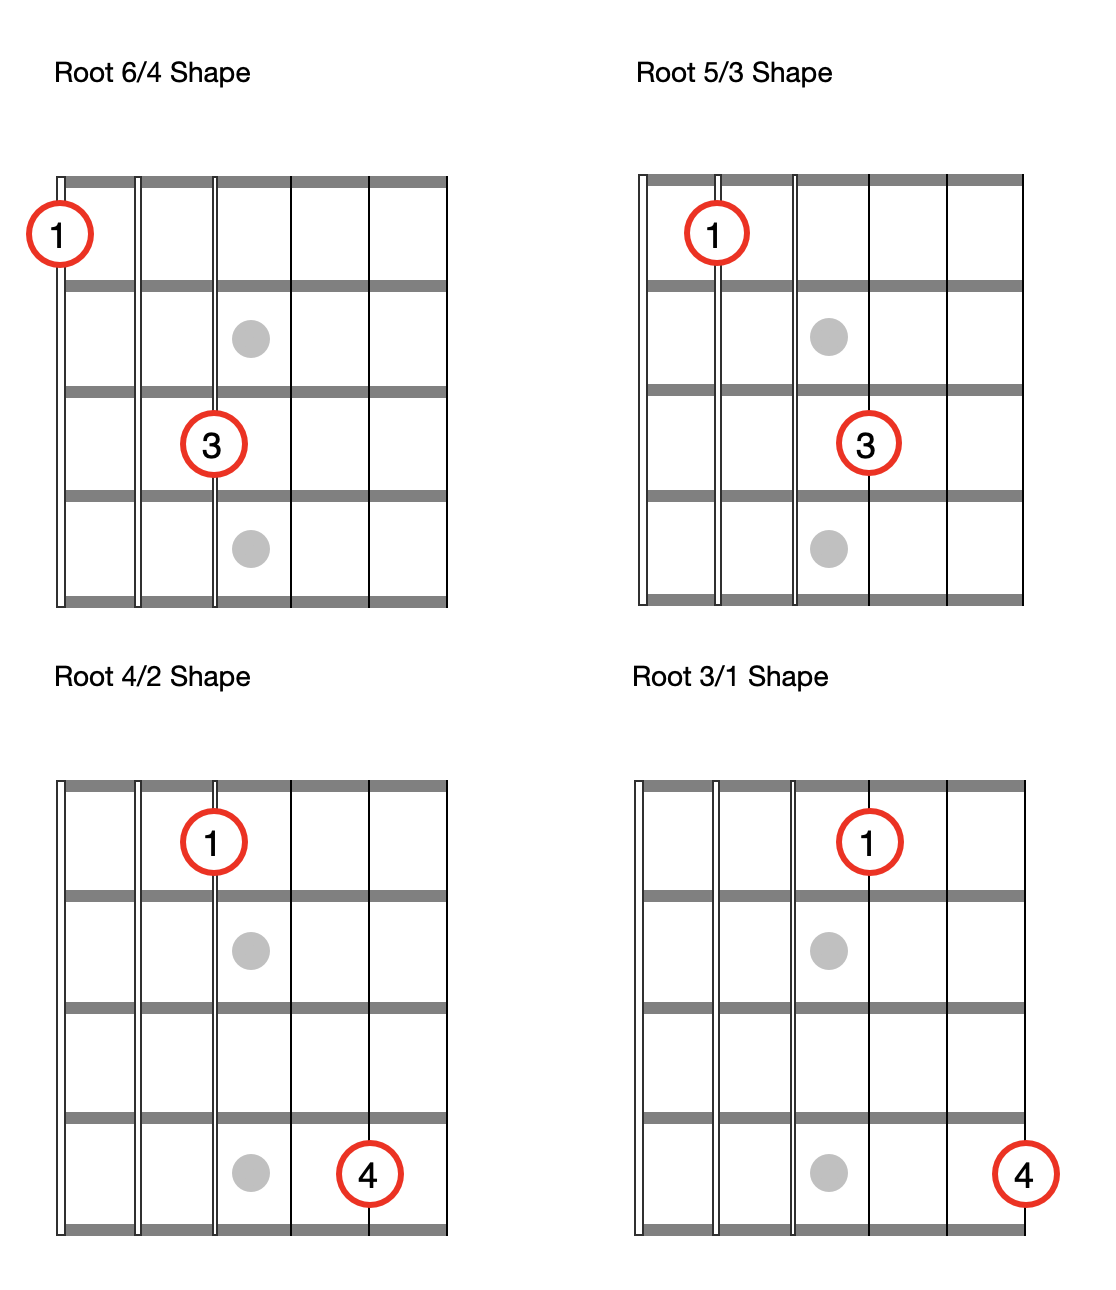
Use octave shapes to help find notes on the high strings. Just use the shapes below, and remember that both of the notes have the same note. For example, if you are playing the 5th fret on the bottom string and the 7th fret on the fourth string, they are both A.
3. Test yourself over and over. Once you know what the notes are, you need to keep testing yourself. Work out all the A’s on the guitar. Or, play all the natural notes. Or all the sharp notes. The exact challenge doesn’t matter; what matters is that you’re finding the notes on the guitar and naming them correctly.
Step 2: Learn Your Barre and Power Chord Shapes
Once you know your notes, you can use these to play barre and power chords all over the guitar.
If you haven’t done those types of chords below, you’ll find HEAPS of guides online (I might put one together in future too, but it’s much easier to get these chords when your teacher can look at your hand and correct your technique.
The key is to be able to play barre chords and power chords all over the neck, so make sure you move them around and remind yourself of the name of the notes.
Step 3: Learn Your Triad Shapes
All major and minor chords are triads. That means they only have 3 different notes in them.
Often, we’ll play a chord with multiples of the same note - our standard open C chord, for example, is played with a C on the 5th string, E on the 4th, G on the 3rd, C on the 2nd and E on the 1st - and that is totally fine.
But, especially in lead guitar playing, it can be better to just play the bare minimum number of notes to keep things simple (from both a playing and a listening perspective).
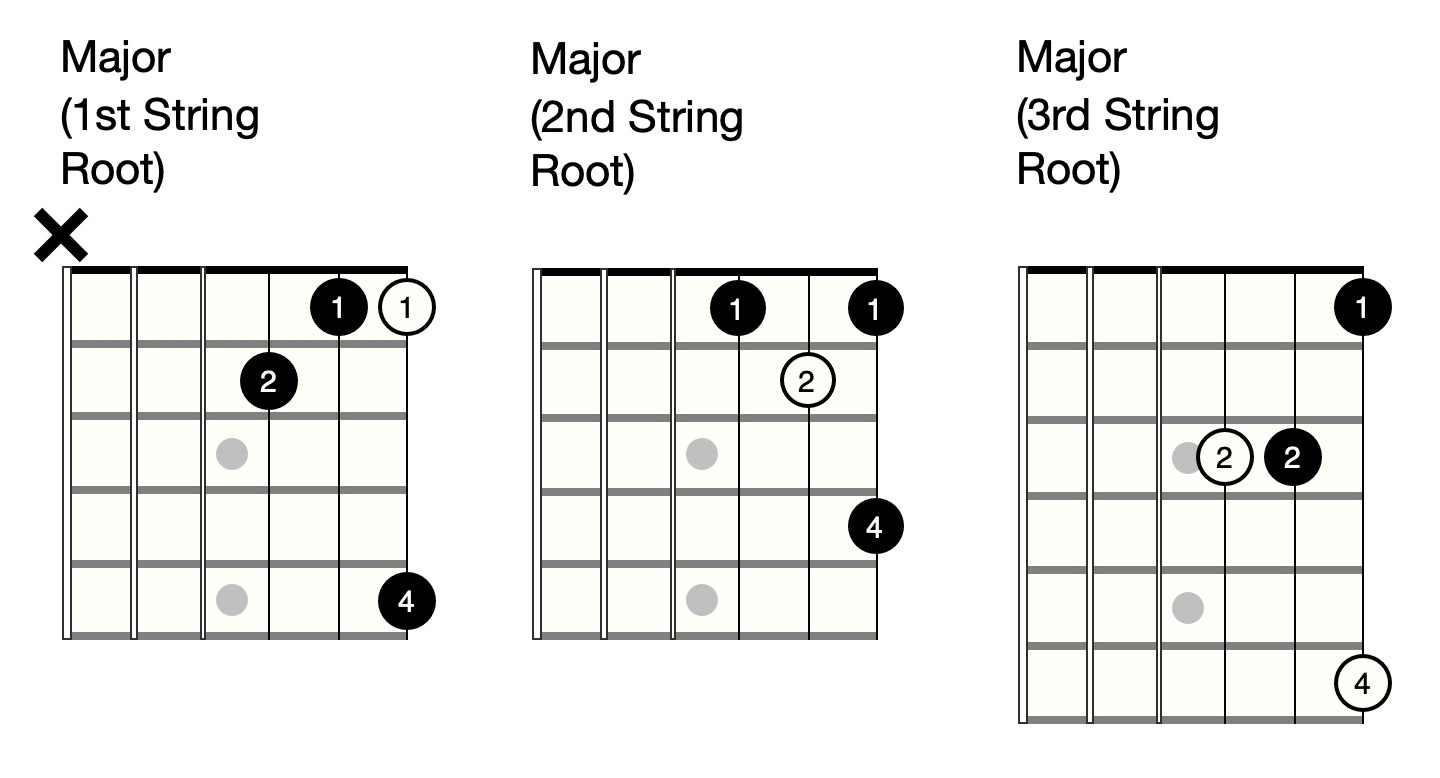
Here’s the 3 major triad shapes on the top 3 strings, using D as an example for the frets numbers. With these three shapes, you can play EVERY major chord on the guitar. All you have to do is slide it to the correct root note to get the chord you want.
The white notes are the root notes, so try to remember which string that is on for each shape, as that’ll help you work out where to move it to get different chords.
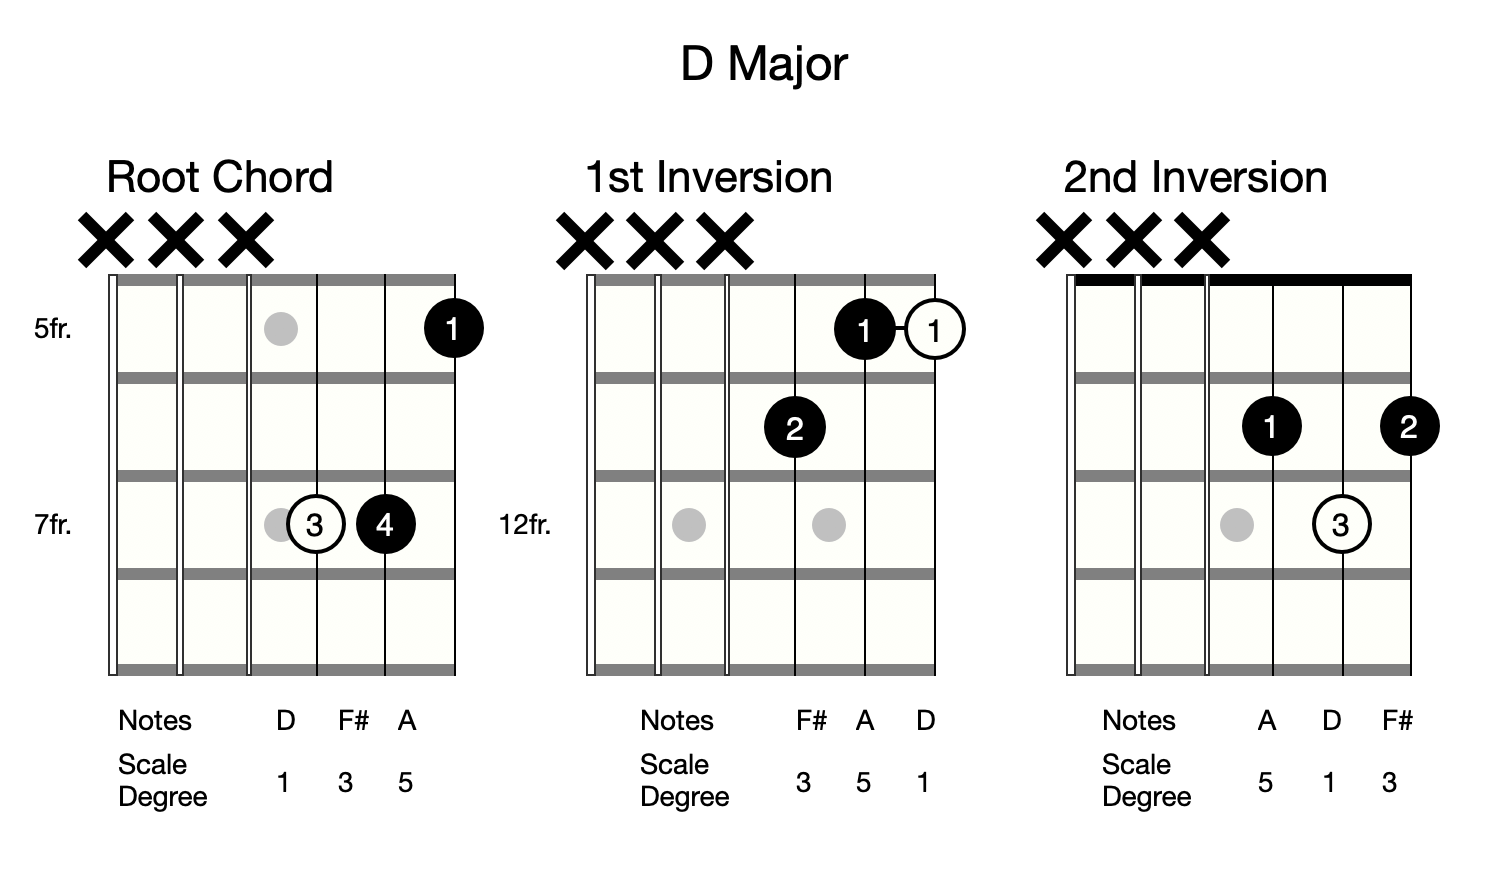
Let me give you an example. If you play your standard open D chord shape, but just play the 3 strings with fingers, you’re going to be playing the 2nd inversion of D major (our shape on the right).
If I move that up two frets, my root note is now E. That means I’m now playing an E major 2nd inversion chord.
So why do we need 3 shapes? Simple - variety. We want options when we choose our chords, and with these shapes, you have 3 to choose from for any major or minor chord.
For you shredders, try playing the notes one at a time and adding in one note like the shapes below for some cool sweep picking shapes.
We haven’t actually added any new notes for this pattern, just doubled up one of the existing notes to make it more practical and interesting sounding for sweep picking.
Step 4: Learn triad shapes for all the other strings
There are triad shapes for every other combination of strings. Just work through them in a methodical manner, which means mastering one set before you progress to the next one.
It’s really as simple as that!
Step 5: Learn the 7ths, 9ths and every other chord type you like the same way!
Bored of triads? No problem - we haven’t looked at our 7th chords and chord extensions yet!
The possibilities are practically endless here, so I’d focus on the ones you like the sound of the most or the ones that come up in the most songs for you and your favourite genres (for example, sus chords for acoustic rock, 7ths and 9ths for soul or jazz and so on).
Remember that these will usually have more than 4 notes, so you will likely have more options for how to play these shapes, but you can still learn them in a variety of positions.
If you can follow this process, you’ll undoubtedly be a master of chords on the guitar.
But even though the process is simple (and probably just seems like common sense once you begin), it’s not a fast one. You’ll likely have to spend years mastering all of the shapes, but that’s fine - this sort of knowledge shouldn’t be rushed!
To finish, here’s a video of some of the highlights from Mitch’s masterclass for you to check out.